Caveman hikes Mt. Amagi, one of Japan's 100 Famous Mountains.


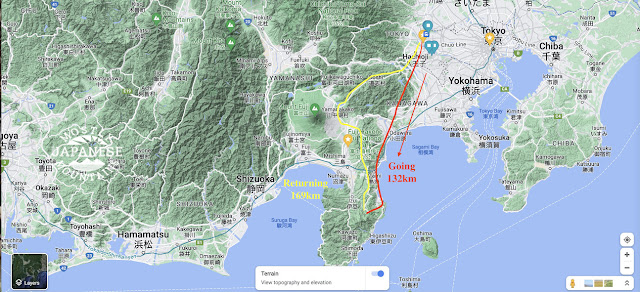
I had Monday off this week.  I decided on a trip that would allow me to make the best use of that long June day.  I headed down to the Izu Peninsula, to Mt. Amagi, one of Japan's Famous 100 Mountains.   (Mt. Amagi=天城--"Heaven Castle")  It's a hike I've wanted to do for a while but have put off because of the distance.  It's not a challenging hike and it's far so it's hard to justify the time and expense.  The usual train/bus route costs over ¥5,500/about $45 and takes 4.5 to 5 hours each way.  I opted to go on my scooter.  That also takes a long time but would cost about ¥700 in gas.  Despite the savings, the drive time had me worried.  Googlemaps gave an estimate of between 3.5 and 6 hours each way.  Assuming the longer estimate was correct, I could be looking at 12 hours crouching over my moped.  Yikes.

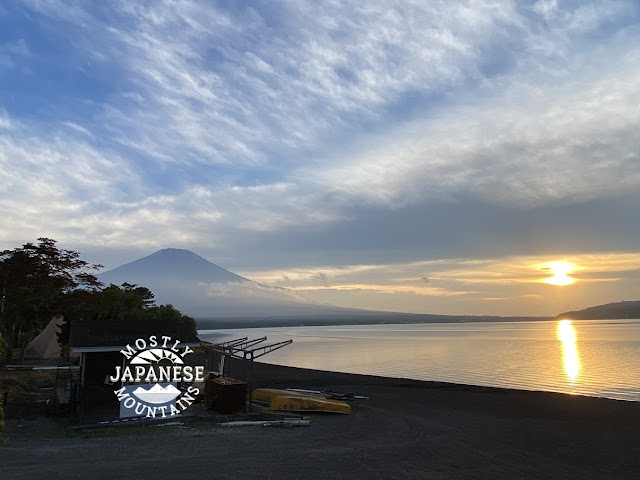
I decided to roll the dice and take my chances.  I got up at O dark thirty and left home an hour later at sunrise.  (4:30 these days.)  Even though it's far, the ride was worth it.  The ride actually gave me the best views of the day.  On the way I caught a glimpse of the top of Odawara Castle while passing through Odawara.  The Izu coast around Atami and Ito were gorgeous.  Coming home, I took the inland route which brought me under Fuji's gaze around Gotemba.  I always wonder "Am I the only one who sees the giant eye on the top of Fuji?"  I was able to enjoy dinner on the shore of Lake Yamanakako at sunset.  That was beautiful.


These first several pictures are of the ride down.   Izu is one giant playground.  The ocean is beautiful, as you can see.  There is surfing, fishing, boating--but also golfing, and hiking.  Its hot springs are quite famous because it is a very active region geologically.  It would be a nice place to spend a week or so if you had a suitcase full of money.


Sagami Bay from Izu

Sagami Bay from Izu  2

Sagami Bay from Izu  3

Here are the details of the hike:
Getting there:  Whether coming by bus or by their own car, most people start hiking at the Amagi Juso Tozanguchi Bus Stop which is adjacent to the Amagi Kogen Golf Course.  You can get there by bus (about 1 hour) from Ito Station.  You can get to Ito Station from Tokyo on the Tokaido Shinkansen.  There are cheaper local trains but they will take longer than the shinkansen.

Facilities:  At the bus stop, there is a free parking lot for hikers equipped with public toilets and water.  The only food nearby I saw was protein bars in the clubhouse.  There is a vending machine for drinks there, too.  Water is ¥210!

The hike:  It's not very strenuous.  There are actually several peaks that comprise Mt. Amagi.  There is Banzaburo , Banjiro and Togasa.  Most people just do Banzaburo and Banjiro.  They are accessible on a loop trail that passes near the golf course.  One side of the loop is the shakunage (シャクナゲ=rhododendron) trail.  I'm not really a fan of hiking near rhodos, but I'm sure it floats some people's boats.

The loop takes about 3~5 hours.  It's about 8km.  The rise in elevation isn't that great.  Maybe 700 meters?

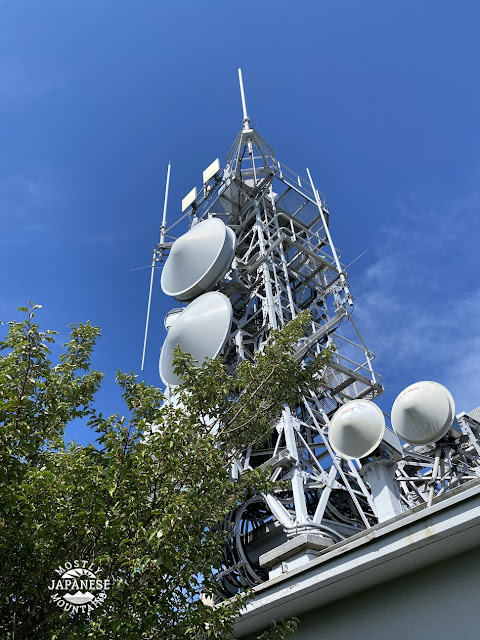
I did that loop and also added in Mt. Kotake.  It wasn't that far and I'm always happy to bag another peak.  After that, I also added Mt. Togasa to my hike.  Most people ignore it because it is about a mile or so down the road from the golf course to its trailhead.  I am glad I did it.  There is a wireless relay station at the top so there is a mostly-paved road all the way to the top.  Also, I got my best views of the day from there.  

My day ended up being 16.3 km which translates to just over 10 miles in American.  I went up and down 1,140 meters in elevation.  

The parking lot/bus stop I mentioned is annotated as the Amagi Kogen Golf Course.  I didn't park there.  I parked just above the uppermost fairway on the map below.  You can see a little blue triangle there.


Before I get to this day's hike, here is a picture or two I took of the area from Mt. Fuji.  


Those last pictures were taken on this trip to Mt. Fuji


These are from the trail:

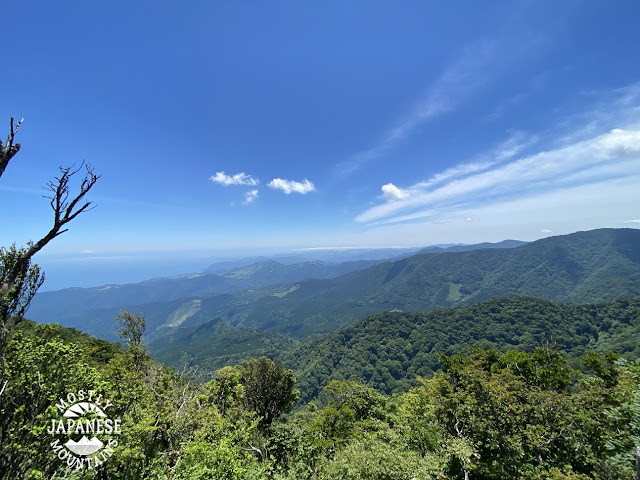
Sagami Bay is on the left side of the picture.


Mt. Togasa from Mt. Banjirodake

. . . and looking back.

Mts Banzaburo and Banjirodake from Mt. Togasa

These are from Mt. Togasa.  Unfortunately, the bay wasn't so visible by this time of day because of the haze.  It was hot.  36 degrees Celsius at sea level.

From Mt. Togasa


More on this later.


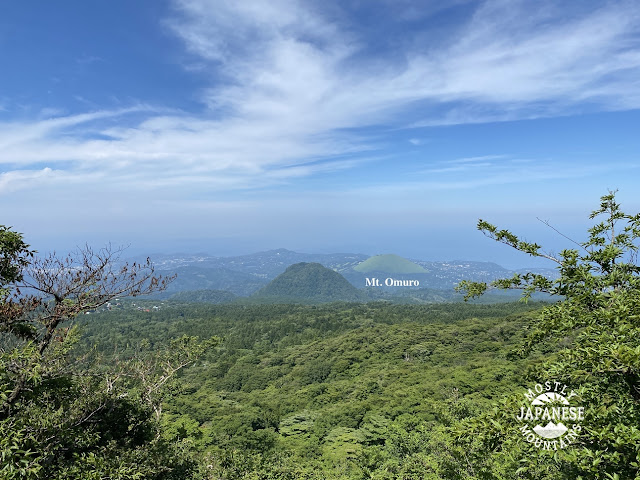
That Mt. Omuro looks cool!


Mt. Omuro in Izu


The relay center on Togasa
Togasa Relay Center


Happy puppies.


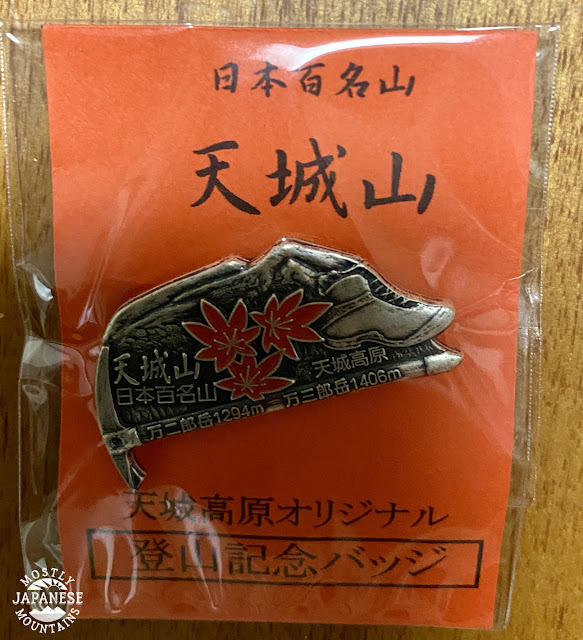
Oh, I should mention the badge.  This is kind of like a participation trophy.  (That I buy for myself.  How pathetic.)  Many of the popular mountains produce a commemorative pin that you can buy.  I try to buy one every time I climb one of the 100 Famous Mountains.  I have a big banner that lists all of the mountains and I attach the badge to the banner each time I get a new one.  I'm such a geek caveman. 

This is the one I got yesterday. 

Mt. Amagi Badge


If you want to climb a mountain that has badges.  Make sure you find out where they sell them ahead of time--or at least before you leave the mountain.  I found out the hard way that if you don't buy them near the mountain, you're out of luck.  There is no one manufacturer that handles all of them.  Usually, they are only available at one vendor near the mountain.  If you don't get it there, you are (almost) out of luck!  They are available on Rakuten or Amazon, but you'll have to search in Japanese.  The ones for Amagi are sold in the clubhouse.

Some thoughts about this trip.  I'm glad I went.  I am not a fan of Nike, but I do love their slogan.  As with most of these things I waiver about doing, just doing it has brought results.  I've never regretted going for a run in the rain or taking on a mountain that pushes my limits.  (I'm not above turning back when things are dangerous though!)

I did this hike during an off-period.  The best months to climb Amagi are May, early June, and October.  Those periods have the best flowers, the best views of Fuji and the ocean and/or fall foliage.
They also have crowds.  There are trade-offs.  On my return, it was really cool to be the only person on Lake Yamanaka.  On the other hand, none of the restaurants were open and I almost ran out of gas because the one gas station on my way was closed.  (Actually, they had just locked the door--5 minutes early--when I pulled up.  But that post is reserved for a review on googlemaps!)


That's pretty much it--except for the ride home.  I got some great views of Fuji on the way.  When all was said and done, I rode about 300km and the trip took me just over 16 hours. 

These are from Lake Yamanaka
Lake Yamanaka


Drop by my cave anytime.

Check this hike on Mt. Ashitaka if you want to see another hike on Izu.
 

How about another 100 Famous Mountain?  Kobushi
Want to see the place where the legendary Kintaro was born? Mt. Kintoki
Still more of this national park?  Mt. Ashitaka

Caveman out


Good x-rays. A long tale before getting to the long trail


The good news is that the x-rays were OK.  What x-rays?  Keep reading to find out.


I haven't blogged about my last few excursions.  I'd just been running a few days after school in the Uratakao area and it didn't seem worth blogging because the weather wasn't conducive to pictures.

One noteworthy thing about being in the mountains during rainy season is how slippery it can be.  One case in point was the other day.  I was just starting to descend from Mt. Kagenobu.  It's quite steep and the mud was slick so I was really being careful.  Just when I was very conscientiously picking my way slowly downhill both legs went out from under me and I crashed down to the ground on my 4th point of contact*.  If someone had a camera running, I'm sure I would have become famous in one of those virus videos I hear the kids are watching on the youtubes these days.  It must have been something to see.  We're talking Three Stooges-level slapstick.  Simultaneously with my legs going out from under me, my arms pinwheeled back and both hands smashed into the ground at precisely the same time as my posterior made contact. 

*"4th point of contact" is how paratroopers say "ass".  It comes from the order your body parts should hit the ground when parachuting. 

My first thought was, "A broken hand would really be inconvenient."  Well, not exactly.  My language might have been a bit more colorful than that.    Both hands hurt just enough for the rest of the day and into the next morning that I decided to get an x-ray to be sure I was ok.  It wasn't the pain or injury that bothered me so much as the thought of having to negotiate life in a cast (casts?) again for a while.  I broke my right hand a few years ago and that was one of the more inconvenient injuries I've ever had.  As someone who writes on chalkboards and whiteboards for a living, work was no fun for a few weeks.  I wanted to be 100% sure also because I still remember breaking my wrist when I was 5.  Mom didn't take me to the hospital for several days after I broke it assuring me it must be nothing--that every time we ran right to the hospital it turned out to be nothing.  We were surprised when we finally went to the hospital to find that it was broken.  Since then it has seemed whenever I do nothing, it's something I should have worried about. When I overreact, it's nothing.  Overreacting now seems wise.
I put off dealing with a pimple on my cheek for a year or two.  That turned out to be cancerous and necessitated two major operations.  As a wise man is fond of saying, "d'oh!"

So, when the doctor showed me the x-rays the other day with my beautiful hand bones all intact I was happy.  I felt like I'd won the lottery.  

While we're on the topic of breaks and x-rays, I'll never forget breaking my middle toe a few years ago.  I stubbed it one night in the dark.  I knew it was broken because I'd really whacked it hard.  I also knew nothing could really be done about it but I decided to get the x-ray anyway.  I'll never forget the doctor solemnly pointing at the image of my toes, "As you can see, it's broken here."   

Except he was pointing at the wrong toe.  He didn't miss a beat when I told him that it was the toe next to the one he was pointing at that hurt.  He just said, "Like I was saying, you can clearly see it is broken here."  

I should have asked him for my money back.  Heck, I should have charged him for teaching him how to read an x-ray!

But I digress.  It's my prerogative.  Besides, the name of this blog is Mostly Japanese Mountains after all.  Since I've gone into telling you that much of this story--and others to boot--I might as well give you some details on those two excursions before getting into what I did yesterday.  That one's the real point of this post.


June 3, Hachioji

One day I went hiking/running in a remote corner of Hachioji.  It was a nice trail for running.  Here is the map*


I started on the street but could probably have parked at the  Shingenin Shrine (心源院) where the trail starts. 1970 Shimoongatamachi, Hachioji, Tokyo 192-0154   Shingenin/Shosanji

  The shrine:


This run took me by the ruins of Hachioji Castle.  I can't say they were much to look at but it is nice to know there is history there.  There's an information center for the castle ruins in the shrine's parking lot, so the ruins are obviously a big deal to someone.  I didn't take any pictures of the ruins because they weren't really much to look at, being ruined and all.
The run was 8km.


This is from the trail:


June 10

The day I hurt myself was on my next hike which was up to Mt. Kagenobu and Mt. Kobotoke.  Those two mountains are also in the Uratakao ("behind Takao") area.  They're not huge and have nice views of Tokyo and Mt. Fuji just as Mt. Takao does.  Kobotoke is particularly useful for working out because along with several trails there is a forestry road right to the top if you want to bicycle up there.  Near the bottom of that road, there is a campground called Hikagezawa Campround.  Hikage means shade.  Zawa means stream.  That name for the campground fits. 


This is the route I took that day.  (I started and finished on the right side of the picture.)


This is just before I fell on my butt.  That is Sagami Lake down below.


Musashi Itsukaichi Station to Sagamiko Station
June 13, 2022

We finally get to the latest trek.  On Monday of this week, I had the day off and decided to take advantage of it by hiking from Musashi Itsukaichi Station in Tokyo down to Sagamiko Station in Kanagawa.  This is about a 24 km (15 mile) hike.  I've hiked most of the way many times in the past but not this far at one shot before.  This is the route.


Let me get the details out of the way
Getting there:  Musashi Itsukaichi Station is the terminus of the Itsukaichi Line.  That is a spur off the Ome/Okutama Line--which  itself is a spur off the Chuo Line. The Chuo Line is the orange train line that runs east to west from Tokyo Station.  Depending on how much you spend/what kind of train you ride, it can be reached in 90 minutes or so from Tokyo or Shinjuku. 
Use googlemaps or something like that to get to Musashi Itsukaichi.  If you don't know the area, the orange trains can be confusing.  Some trains split in half and the front and back cars go to different destinations.  All manner of bewildering things can happen.  
Getting Back:  Sagamiko (=Lake Sagami) Station is the first station west of Takao Station on the Chuo Line.  Coming back to Tokyo, you may or may not have to change trains at Takao.
Distance:  24.5km 
Elevation:  Up 1,973m Down 1,959m
Facilities:  No water on the trail.  The only public restrooms are on Wada Pass, Mt. Jinba and Myou Pass, all of which are a long way into this hike.  Myou Pass and Mt. Jinba have some kind of snack bars but are only open during the busiest times; ie, almost never.
Time:  I did it in eight and a half hours.  I don't run, but I'm faster than most people.  


For this hike, I started at the Musashi Itsukaichi Station and walked along the street (Akikawa Kaido) for a bit before turning left, going down the hill to cross the river at the Kowada Bridge and finally passing into the mountains by the Kotoku Shrine.  Kotoku Shrine Map


This is Tokyo.  Can you believe that?

The shrine


This is a power substation.  I've seen this on maps before and was curious but have never taken the trail that passes by.  Seeing it was impressive.  It's huge.


This hike takes you across 15 mountaintops so there are several nice places to take pictures.  These are just a few.  (This post is already too long.  You deserve a medal if you're still with me.)


Skytree


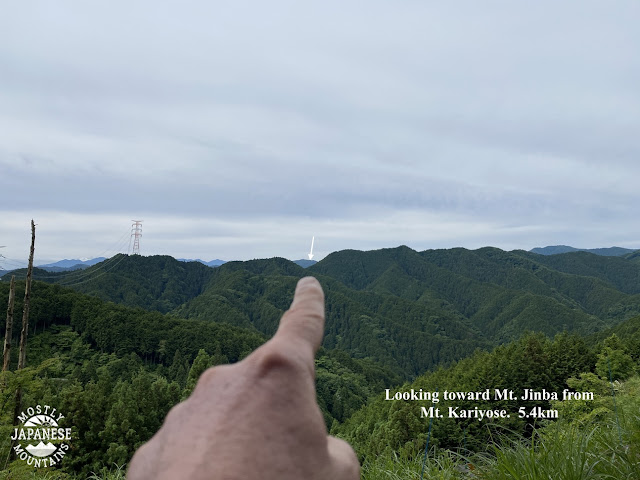
This is Wada Pass.  You can't quite see it from this picture, but there is a street that runs perpendicular to the viewpoint of this photo.  It slopes down steeply on both sides.  Hachioji and downtown Tokyo is to the left.  Hinohara Village and Yamanashi are to the right.  There is a parking lot here.  (You have to pay.)  There's also a public restroom and a snack bar.  Mt. Jinba is 700 meters to the rear of that shack.  Mt. Jinba is one of the mountains I've climbed the most times because of its proximity to this street.  Every time I have ridden by here on my bike I have taken the opportunity to go to the nearby top of Mt. Jinba.


That horse-type statue is on the top of Mt. Jinba.
What exactly it is, and what exactly Jinba means is a mystery to me.  The Japanese character for Jinba has some relation to "battle formation" and "horse", maybe.  "Battle formation" and "place" seems to be one alternative old reading of Jinba.  Either way, it seems this mountain's name has something to do with where Takeda's army set up camp during the Sengoku ("warring states") Period. 


Whatever the etymology.  It is a mountain with really nice views 360 degrees around!  Fuji was hiding this day, though.


Getting close to the station.  This is the Yose Shrine.


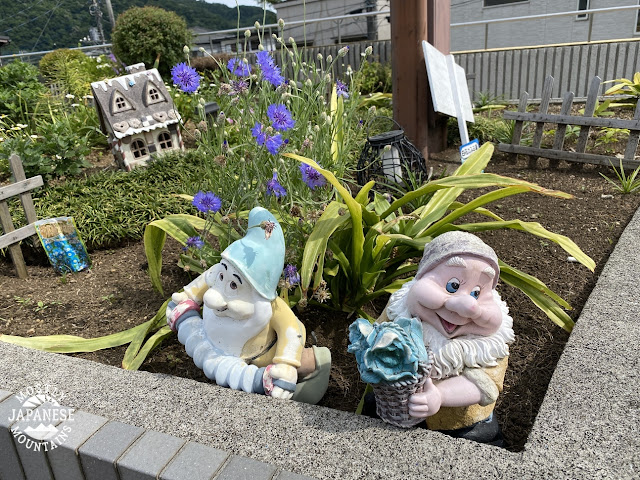
I hope mountains keep me small.  That is, to say right-sized.  About the size of these guys.  I hope I never get too big to wonder at the beauty of Creation.
(This is a little installation at Sagamiko Station.)


Be sure to drop by my cave again soon.


test


This is a request for you cavedweller types.  

I'm trying to figure out how to link to GPX files so I can show more interactive maps on the blog.  Do me a solid, will ya?  Click on the links below and leave a comment to let me know if you see an interactive map or not.  So far it hasn't worked for me.  Thanks!

TCX Hachioji Castle

GPX


https://drive.google.com/file/d/18TRZZlg73bCRe94Hk0hANmKX_uoV7Oid/view?usp=sharing